by
by Peter Robbins, 27 April 2026
Wargame Design Studio is on a roll. They’ve been rocking out hit after hit for the last two years and I just don’t know how they pull it off so frequently with consistent quality. I’m particularly fond of the Musket & Pike engine wargames in their offerings. It is my absolute favorite of the bunch. I feel like it marries to the game engine the best of all of the series.
The musket and pike era is also a genre of wargaming that I’ve enjoyed in the past in miniatures and board based gaming in similar ways. I will openly state that WDS’ myriad of offerings in the late Renaissance through the Age of Reason have absolutely broadened my understanding and breadth of knowledge of the time periods involved. I would have never have meandered so far into the Thirty Years War or the Great Northern Wars through the Seven Years War if it had not been for WDS. Just flat out, period, end of sentence. Most of my experience in the past had either been Rev War, or English Civil War only. WDS have broadened my mind through their wargames. That is a rarity, and more so in the computer wargaming industry. Board games would normally take that prize, and they do and will continue to, but WDS just absolutely know their customer base to a T, and it continues to show in each of their much improved game engine offerings over time.
So now we come full circle it feels like. This is the one I’ve been waiting for: American Revolutionary War. This is one of the first titles of the Musket & Pike series that was intentionally tackled to fully replace an older title. And absolutely Bravo on the results my WDS friends. This is an absolute shining star of a wargame. I do believe it will quickly be regarded as the best of the series. And that is saying something as the whole series rocks. I’ll use my coveted description of “masterpiece”. I don’t pull that word out often.
What’s In The Box?!
Documentation
You may think this is the painful doldrum in the virtual box, but WDS put out some of the better manuals and tutorials around. Definitely read the “big three” pdfs before diving too far into the larger battles.

click images to enlarge
Read through the whole Design Notes, General Info, and Getting Started pdfs before getting into game play. You will thank me for it. The General Info one in particular has some really good basic information that you will repeatedly want to reference throughout play. That manual is sometimes overlooked. All three have very useful information specific to the fighting style of the period, operational limitations, and overall environment of the American Colonies at the time. Please note that WDS’ website for their American Revolutionary War game has linked copies of ALL of the user manuals! Check it out before you check-out a purchased copy.
After you get a couple battles notched on the belt, go back and read the full User Manual cover to cover. That’ll provide you some hot key combos you may have missed otherwise in the above three documents.
Scenarios
Below is our obligatory pieced together pic of ALL of the provided scenarios. This one is a doozy. 147 scenarios are provided with the American Revolutionary War game.

I challenge you to complete all of the provided scenarios to any victory condition. Let me make it a little easier on you and say, at least the first scenario of each named battle (the Historical scenario more often than not). It would be darn near impossible (likely) to have minor success or better in each, but hey I’ll challenge you to that as a bonus goal.
Campaigns
Below is a quick walk through of the windows you will be presented with as you start a campaign. Here I’ve chosen the 2nd campaign, which is the Philadelphia overall campaign. If I’m not mistaken, you use a global Order Of Battle, which is retained between the scenarios. This is really cool, as you MUST preserve your forces for the next battle in the spidering of the campaign decision tree.


Editors
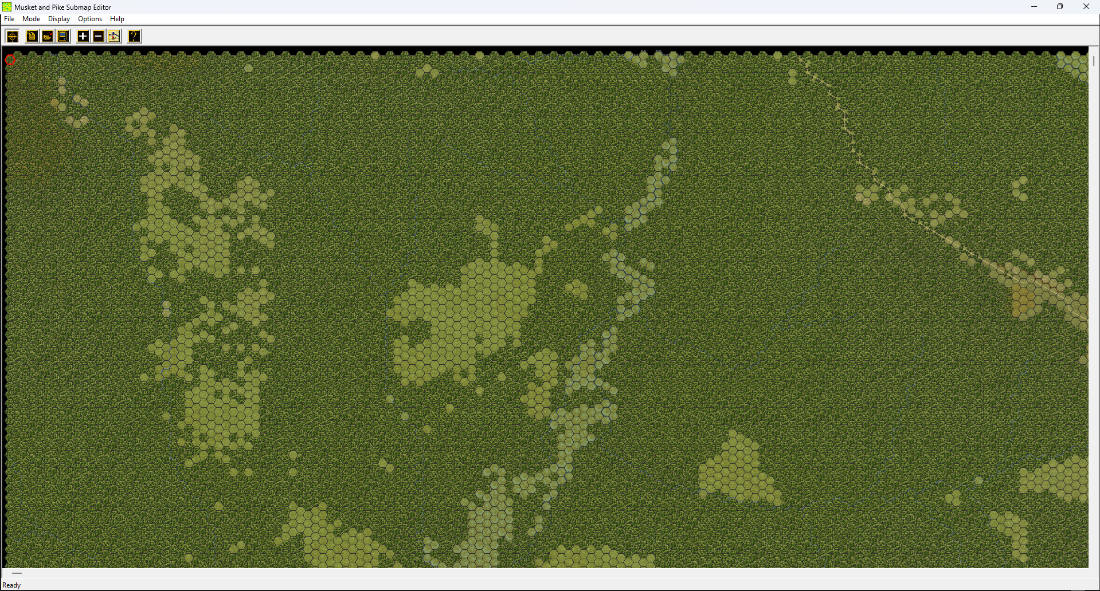
Be aware that not only do you get the core game, but you also get a campaign system, campaign editor, scenario editor, and sub-map editor with the purchase of the game.

Campaign Editor

Scenario Editor

Sub-Map Editor
Mechanics & Gameplay
I’m going to slow roll the mechanics by way of a player turn checklist I concocted with my robot friend GPT 5.3. I’ve placed the full doc over here in case you’d like a copy: Player’s Guide – American Revolutionary War (WDS).pdf
The Turn Checklist we’ll review quickly each turn of this play thru is the following:
- Check objectives (O key)
- Check command (leaders + detached units)
- Check unit condition (disorder/fatigue)
- Set formations (line vs column vs skirmish)
- Plan movement (terrain + LOS)
- Move carefully (avoid exposure)
- Fire (Shift+F to check range)
- Melee only if advantage
- Reposition + recover
- End turn safely
I’ve chosen the Germantown (October 4th, 1777) historical scenario, as our play-through scenario for showing off the mechanics of the game.
Below is the briefing from the Designer Notes:

A summary for Germantown (1777) was also provided in the Design Notes as:

Before I get into turn by turn checklisting (and showing off the game mechanics); I’m going to quickly answer a few military decision-making related questions that I’ve found are the most useful to Hobbyist Wargamers.
The Three Basic Military Decision-Making Questions
- Understand the area that you’re fighting in (physical terrain, weather, human terrain)
- Understand the enemy that you’re fighting (capabilities, their mission, what must they do, how they will do it)
- Determine what we will do (what must we do, what higher tasks, how will we array our forces in time and space, what is our end-state condition, how do we prepare ourselves to transition to the next mission)
Note: The above was originally provided by Apoc of the Tanksim Discord community.
The Environment
First off, see the various maps posted further below. A couple of them offer a good look at the contours of the land. In addition, let’s take a holistic look at the environment, and any other factors other than the enemy and our own resources we can think of. A couple immediate environmental factors to keep in mind: It’s early morning for one, damp, wet, and very foggy. To check this in game, you look at the bottom left description of time and weather as the turns play thru. It’s unknown at this point when the sun will actually come up, and whether or not it will increase the initial visibility with one hex.
Area Maps
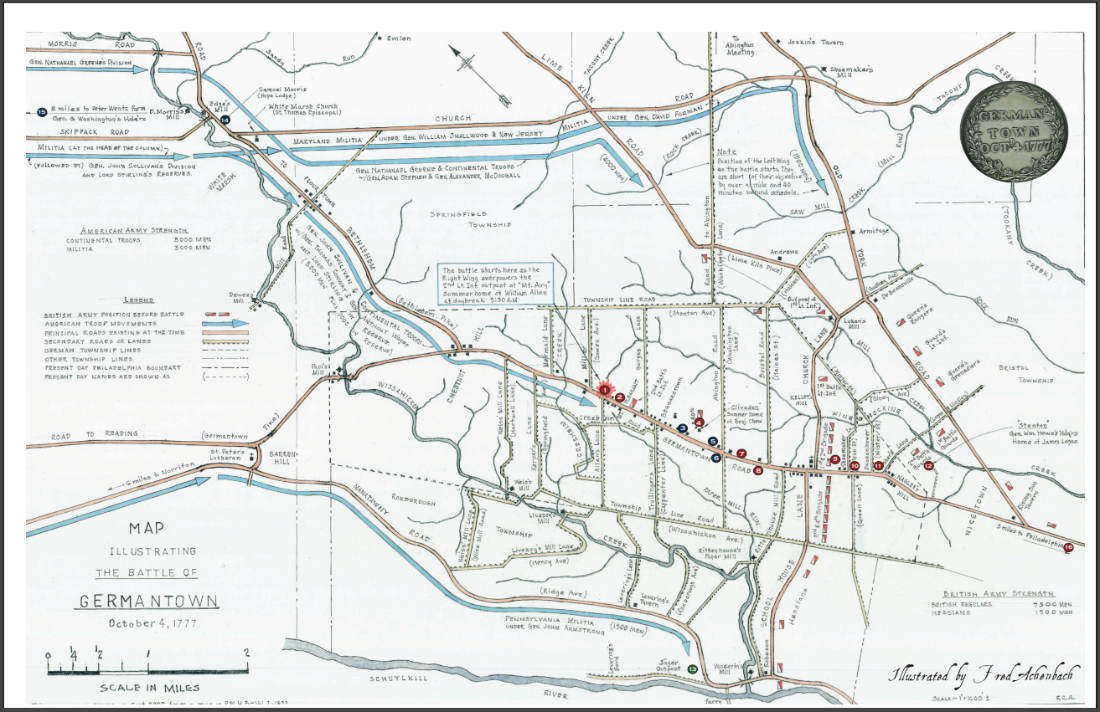
A set of Military Maps depicting the battle area, both contemporary and modern in making, are below as a small gallery.


In this map, if you look closely at each of the UNC Blue lines of approach, they have the troop totals for each approaching column readily shown. Nice image. The source of this image is the Cliveden house memorial trust site.

Speaking of Cliveden House, here is a modern picture of the restored house, and a painting of its condition as the battle unfolded day-of. This site is worth visiting! This website is also nice.


The Enemy
There are known to be 8 to 9,000 British & Hessian combined troops in the immediate area of Germantown, Pennsylvania. Germantown is about 5 miles north-northwest of Philadelphia proper. We do not know the exact enemy dispositions but it is very likely that pickets will be posted along the main highways into town. With 11,000 continental troops of our own, and the element of early morning surprise we should be able to disrupt the enemy from being able to support Philadelphia if the day is won.
Our Plan
I gathered up the overall Continental plan into a set of standing orders as if I was General Washington sending out couriers to my two wings, militia, and reserve commands. That is found here Germantown 1777 – WDS American Rev War – Standing Orders (Continentals).pdf No imagine George saying them out loud with wooden teeth “I unnnt youuuh tooooha…”
Using Envoy With WDS Wargames
I’d normally use Envoy to help add a higher level of realism by way of courier message delivery between the overall commander and his wing commanders, and then from the wings to their brigades, but alas, the latest version of Envoy is not up-to-date with the latest save file formats (yet). I know the developer of Envoy, and I’ve been in touch to help determine what needs adjustments.
You can download envoy here
Game Play Thru
I’m going to pick up the action for the continentals at Georgetown from Turn 10 onwards, as I’ve been fighting this out for a few days now as time has permitted to play with the plan I generated and linked above. This takes us up and through first contact with the enemy, which as we know is when all plans go to hell; and alas things have gotten murky in our middle. The main effort with Sullivan’s Right Wing is not faltering, but it is getting its nose bloodied by small pockets of picket forces along our axis of approach into the Northern outskirts of Germantown.
Turn 1 to Turn 10: Jump Map Comparison

Before I show the two Jump Maps, above is the full Order Of Battle as provided via the Info / Show Organization menu item. This screenshot is also showing off the newer pre-dawn darkness visual that was recently introduced in Crusades Book II. They mapped over that functionality here into the Musket & Pike series first for use in the American Revolutionary War.
Now, below is the Turn 1 starting dispositions of the Continental forces.

And below is where we will pick up the action in media res, during Turn 10 of the action. So we’ve gone from 0500 in the morning now up to 0730 as the sunrise is about to occur in the next turn or two. Visibility remains One Hex.

Let’s zoom into a side-by-side of the jump maps, with a few things pointed out in more detail.

I was able to alter history a tiny bit (don’t get too excited), by bringing both militia forces together below Germantown, in an attempt to cut off the enemy retreat lanes. I was able to get the Right wing past the Mount Airy area pickets, but not without a bloodying of noses. The left and reserve have both been in a Frozen status for the duration, the reserve unfrozen only in recent turns. Now both Militia forces in the south are newly reset to Frozen status. So, lack of maneuverability is killing me as commander in chief here. Our attempts to keep the two main continental wings in sync is failing to a degree. I need to correct for this and not get a failure by 1000 cuts into the later half of the 33 turn scenario.
Ok, let’s slow roll the checklist for the next turn so we can show off mechanics properly.
- Check objectives (O key)
- Check command (leaders + detached units)
- Check unit condition (disorder/fatigue)
- Set formations (line vs column vs skirmish)
- Plan movement (terrain + LOS)
- Move carefully (avoid exposure)
- Fire (Shift+F to check range)
- Melee only if advantage
- Reposition + recover
- End turn safely
Ok let’s start with the first two items:
- Check objectives (O key)
- Check command (leaders + detached units)
We do need to stop and take a few objectives, as we’ve positioned ourselves well in some areas to do this. Otherwise, we are not getting credit for our advances of the militia towards the market area of the town. Checking command radius, my right wing needs to be addressed to get everyone out of a detached state. I’m addressing that now. Let’s look at one example of that adjustment.
Below we take a gander at Wayne’s 4th Division, which is composed of the 1st and 2nd Pennsylvania continental regulars.

Gen. Wayne himself is “Detached” which is not a great condition for a leader to their superior. Their checks will be less effective. We need him to align better with his commander. Also, he has a couple battalions out of range, and they are likely showing up as Detached from his command as well. We need to gather this Division up a bit better. Doing that now.

Above, I show how the 4th Division commander is outside the command radius of the wing commander. We’ll slowly remedy this as we get everyone out of Column Of March into Line formation and start making some semblance of a line of battle.
Take particular note that changing from Column Of March to another formation takes a unique key command. Its menu option is Command / Column Of March, to switch from March to Column formation. Then you are able to switch from Column, to Line with Command / Change Formation. This combination of sequential changes takes a LOT of movement points to accomplish. In fact, almost all of them for the given turn. So, be aware of this.
This game definitely teaches you quickly that these muddled up bits of wooded undulating American terrain were difficult to maneuver in the traditional linear combat approach. Hence, some of the open order capabilities have been added to this particular offering of the Musket & Pike series, as they were adopted much more readily in this conflict.

Above, into Turn 12, we are still regrouping forces. Once you hit any form of enemy, regardless of size of force, they are easy to disrupt your column of march. Bypass the enemy pickets as much as possible but there is a point where some forces need to stop and stand the ground to force them to exit stage left. Which I find, the enemy AI does not do willingly even if they have overwhelming forces nearby (nor do they move out to inform other commanders of what’s approaching). This is something that is difficult to simulate in a hex and counter wargame AI.
For these checklist steps, I’ve been doing this piecemeal between Turns 11 and now into 12.
- Check unit condition (disorder/fatigue)
- Set formations (line vs column vs skirmish)
We are at the point where you need to be out of Disorder state to get out of Column Of March into any other formation. So that is somewhat intrinsic in step 4 for getting into appropriate formations to start throwing some lead at the enemy lines. So far we’ve not bumped into their main forces. Again, take note that Disordered units are not allowed to do many things. Take note of this section of the General Help pdf shown below.

Take particular note of everything listed under “Disorder”. Just, avoid it at all costs where possible. It’s not always easy to do given some of the cramped approaches from the north into Germantown in this scenario.
Now we move into checklist items:
- Plan movement (terrain + LOS)
- Move carefully (avoid exposure)
- Fire (Shift+F to check range)

We aren’t in too bad shape sync wise, but the darn Left Wing needs to have a firebrand up its tukus to get moving darnit!
One point to make during all this is the newer Column Of March feature in the American Revolutionary War. It takes a little getting used to. I’d describe it as akin to the transportation mode in the Panzer Campaign series by WDS. It is a unique state that eats up a lot of movement to get into and out of. Below are notes on formations and the newly added Column Of March formation from the Getting Started and the User Manual pdfs.


A word of caution that I’d mentioned elsewhere, moving into and out of Column Of March is pricey, as to movement points. At most you may be able to go into or out of it, and then otherwise move one hex or change formation or facing at best. Not many troops have enough movement points to do much more. So Column Of March is truly more of an operational movement mode. Treat it similar to the transport mode in Panzer Campaigns. As soon as you sense you are about to contact the enemy, start changing to column quickly, and then line as fast as otherwise needed to lay out some lead en masse.
Another note from the User Manual is this tidbit: “To take control of an objective you must occupy the hex with a non-detached combat capable infantry, artillery or cavalry unit”. Woop there it is. A major reason not to remain detached for too long. The rule mentioned below is on by default.

In turn 13 we start to see our militia formations hit hard by enemy line troops. Not a good situation. Yikes.

A good menu item to check is Units / Releases, to check the release schedule from Fixed status.

Eek. The two militia and the left wing do not release from FIXED status until 9 AM. That is three more turns from now. Yikes. I think a court martial is in order for Greene darnit. What the heck?
We’ve made our way now up to turn 14, and we still have some fixed units. It’ll be two more turns until they all free up for maneuvering into position. Also, below, you’ll see that I’m re-checking which of our forces are officially spotted amidst the murky fog over the entire battle area.

I’m going to wrap up my walk through now as I want to get this article out so the community can see the taste provided so far. I’ve gone from First Impressions Into soliloquy territory here, and that was not fully intended. I’m easily distracted by an immersive game like this one.
ARW is an incredibly good wargame and one you should absolutely consider adding to your collection if you enjoy hex and counter wargaming to any degree. WDS’s offerings, and American Revolutionary War in particular, is a master class in this period of conflict. I’ve said it before, and I’ll say it again, I personally feel that the Musket & Pike newer game engine is the pinnacle of WDS wargame offerings. For me, to my tastes, it is the most congruent to the game engine. It just “fits” like a glove. The scaling to phasing, to combat effects and morale effects are just perfectly balanced for these size battles, and both the Battalion and Company sized offerings in this particular game of the series.
I’ll close this section with a map of how the battle played out historically below from the American Battlefield Trust. I’m well on my way to doing equally horribly 😀 a supposed sure victory stolen away by hubris and impatience on my part.

Final Thoughts & First Impressions
I’m exhausted, but in a great way. Meaning, you feel like you’ve accomplished something getting through a full scenario at least only partially demeaned, as is my usual MO. I’ll take a Minor victory or defeat over Major Defeat any day, so, yay. That unfortunately is my personal results metric stick. American Revolutionary War is a fantastic game. It has all the hallmarks of the Musket & Pike series, but I think the sheer bulk of coverage is huge, and the attention to detail is fantastic in this title. I myself love this time period, and the history of the conflict, and I also think it just marries well to the system found in the WDS game engine. You will be hard pressed to find a battle you are familiar with NOT represented in this game. It is quite clearly the fore-runner of content coverage for Rev War games. AWR just shines in every way that has made WDS games great for years. It is a masterpiece of historical preservation and wargaming bliss. Bravo WDS on yet another hit in a series of hits. Keep ‘em coming!
P.S. – A Few Gallery Shots
You can chat about this game in the Age of Gunpowder section of our discussion forums
Thank you for visiting the Regiment of Strategy Gaming and riding with The Armchair Dragoons.
Rather than list a bunch of social media links, the easiest thing to do is to check out our LinkTree, which connects you to all of our various locales around the web.
You can also support The Armchair Dragoons through our Patreon, and find us at a variety of conventions and other events.
Feel free to talk back to us either in our discussion forum, or in the comments below.