by
by Paul LaFontaine, 11 October 2026
The Last of the Kingly Charges
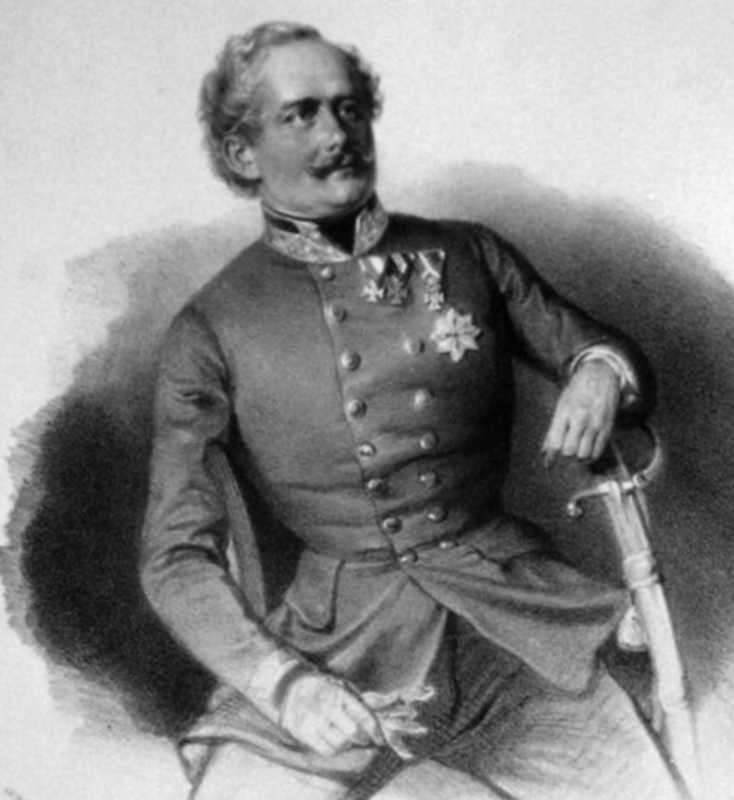
Victor Emmanuel II was more than brilliant facial hair and admirable posture, he was the reigning king of Piedmont-Sardinia (Sardinian) who led a charge into the Austrian flank at Palestro and collapsed an attack on his forces.
The Austrians were beaten, and setting aside the fact that Victor Emmanuel II achieved his victory by leading French Guard Zoauves into the assault, it is the last recorded time where a reigning monarch led soldiers in battle.
most images can click to enlarge
This man was tasked with restoring a strategic flank. From the Austrian perspective, the vassal state of Sardinia was offside, and despite getting the aid of the perfidious French, needed to be pushed punitively to compliance. The main Austrian force was guarding the river to the south, but reports had come in that the Sardinians had crossed the Siese River near Palestro. Feldmarschall-Leutnant (FML) Thomas Friedrich Freiherr von Zobel was ordered to march his VII Corps thither, and stabilize the western flank of the Austrian position.

Victor Emmanuel’s goal was to make it appear the main effort was in his area and Milan the target, drawing Austrian forces away from the actual French offensive, which was to be farther north. Zobel’s goal was to push the Sardinians back across the Siese River and stabilize the line.
On 31 May, Zobel (Red) attacked with two of his VII Corps divisions. The initial assault buckled the Sardinian line.
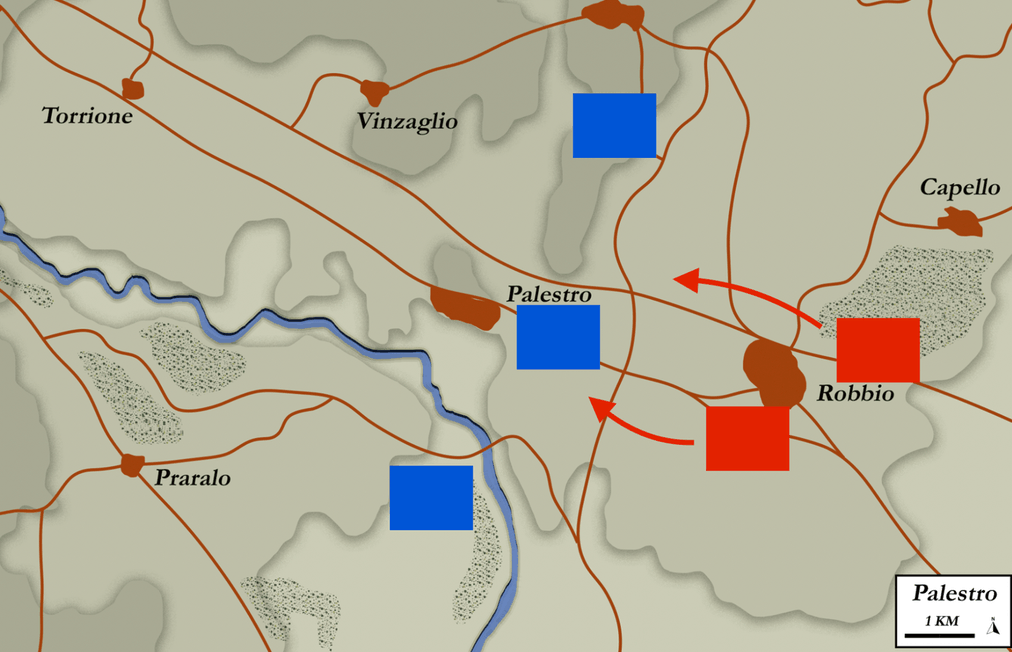
The momentum reversed when these gentlemen;
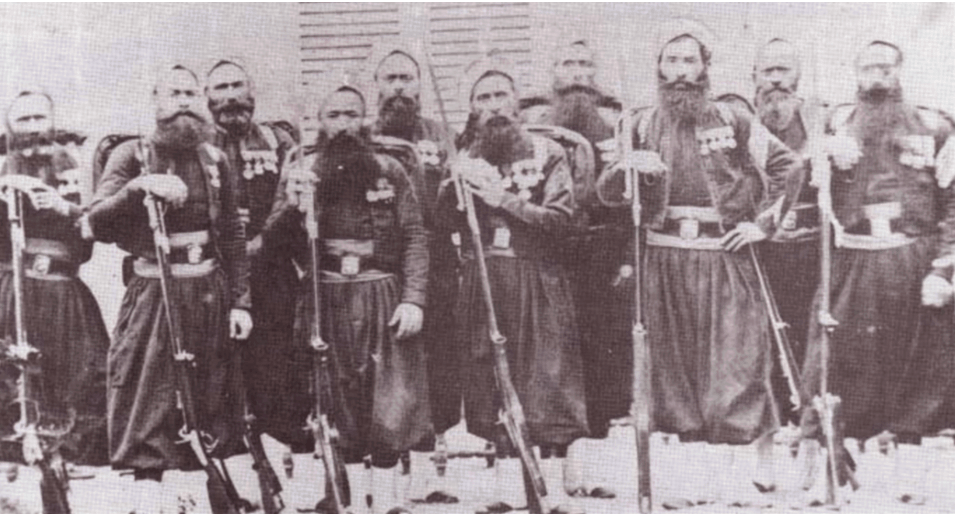
accompanied by Victor Emmanuel, came up from a ravine beneath Palestro, and attacked the Austrian left flank, forcing their withdrawal toward Robbio.
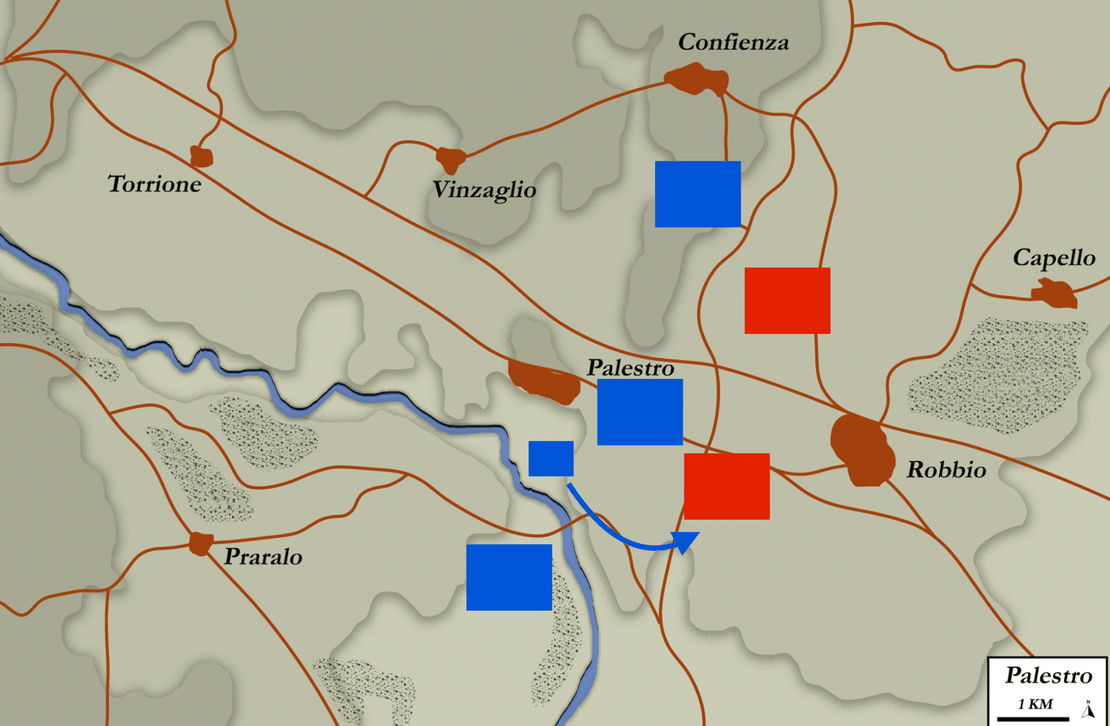
The Austrians tried another general assault, but it was repelled by Sardinians who defended Palestro and the ridge to its north. Zobel withdrew, and the last attack led by a King was marked as a success.
The Game
The size of this game in terms of regiment count and the timing of the attacks and counterattacks made for a potentially good Kriegsspiel. The danger was that both teams would line up at Palestro and try to settle the issue by fires, but we avoided the linear shin kicking contest and had a spicy session with quite a few decisive moments.
Dr. Truth and Rebelsqurl were our Austrians, and played very well, bringing to the table an Austrian panache and directness. James, Lewis++ and Jacks played the Sardinians, coordinating well. Lewis++ played the good king, and was in the decisive chair when it came to the strike that could unseat the Austrian effort.
The Sardinians outnumbered the Austrians:
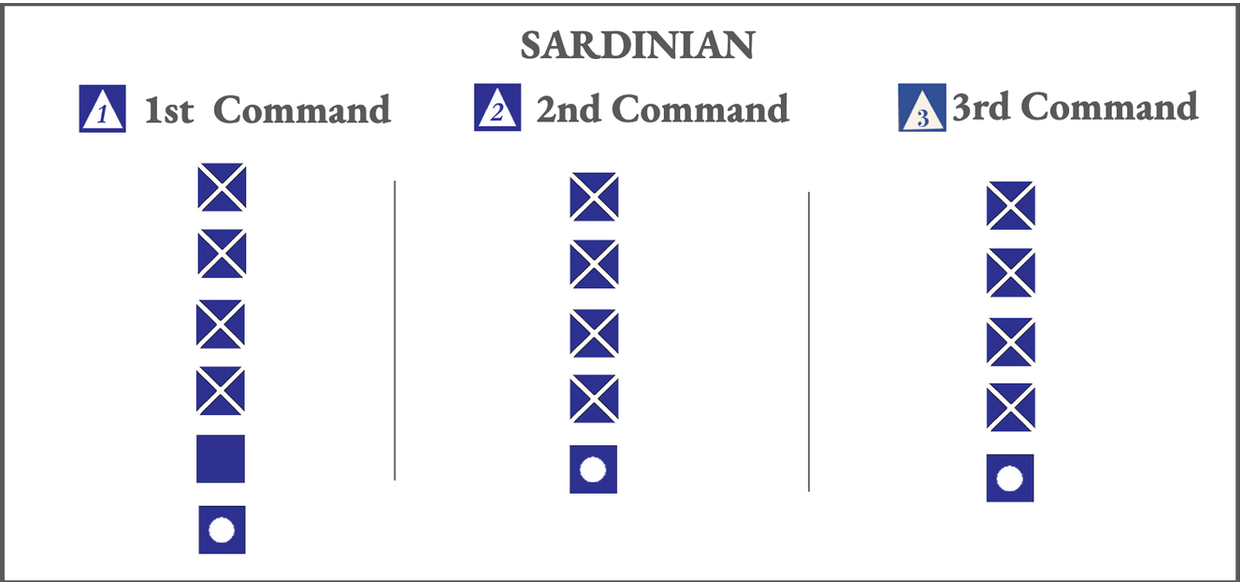
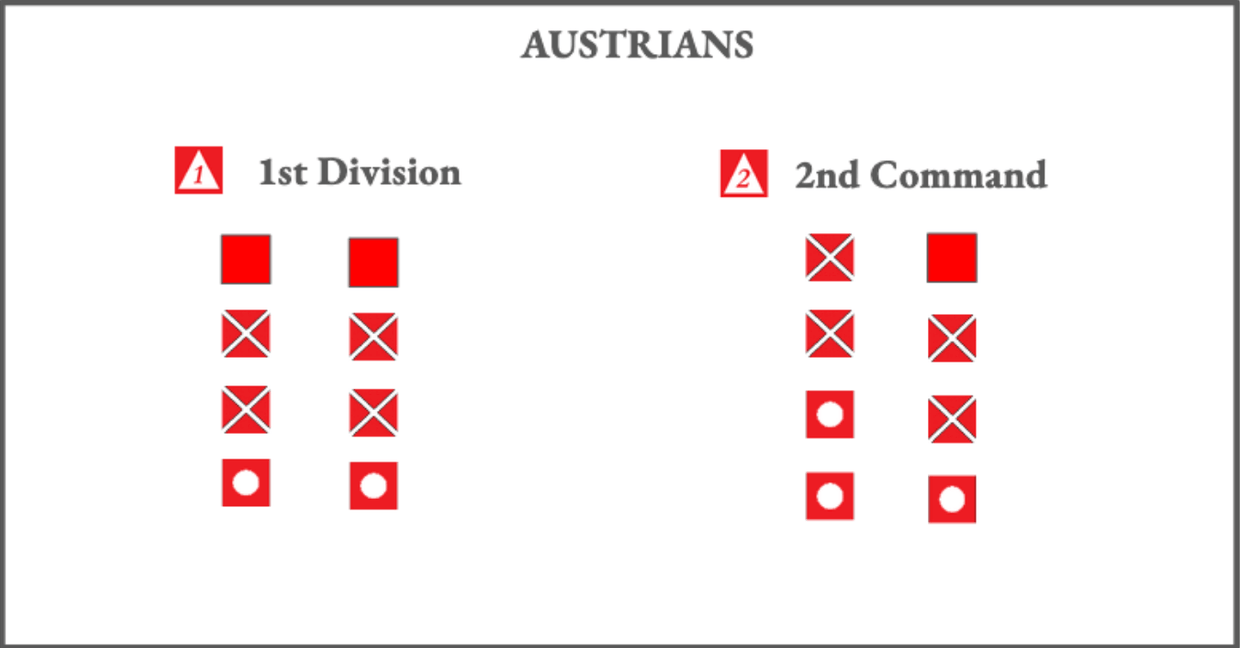
The Austrians opened the battle concentrated and connected in two wings. The Sardinians were spread out with a river barring the 3rd Command from easy access to the battlefield.
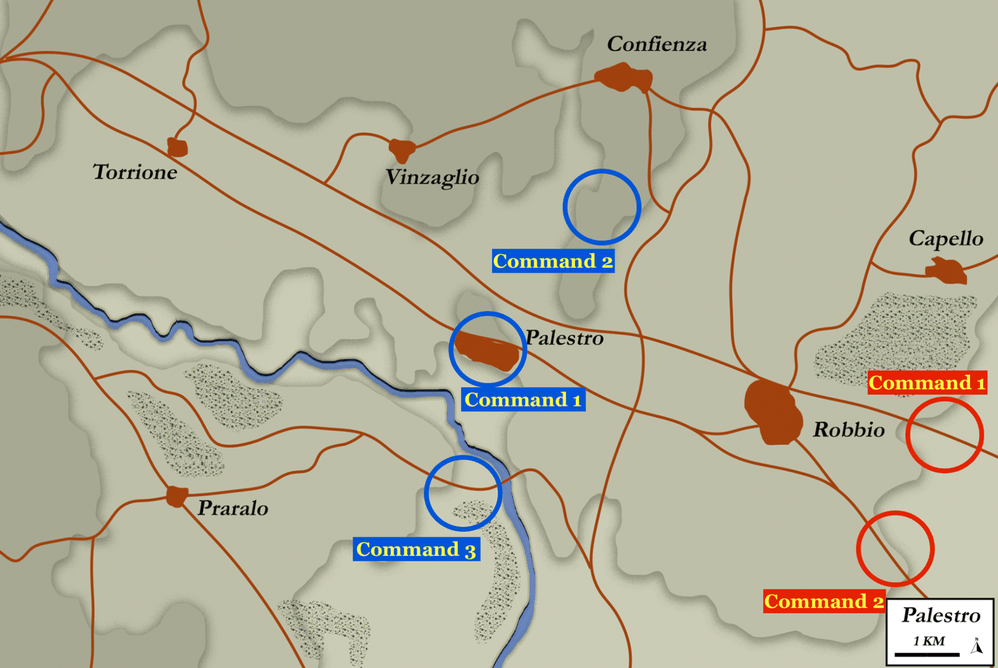
The Divergence
This is another of a series of Kriegsspiel AARs very similar to the events in our Wargame HQ at the Origins Game Fair. You can find the original article here.
Historically the king was adjacent to Palestro and riding with the 3rd Zouaves. When the Austrians were beginning to collapse the Sardinian line, it was a stark choice to either withdraw or attack, and Victor Emmanual chose the path of glory. We could not play our game this way. Putting a player in charge of one regiment south of Palestro would be awkward, and telegraph what should be done. I altered the scenario accordingly. The third player would join the 3rd Command south of the river and make the decision to cross at the critical time. This would preserve the independence of action that the king had, while giving that player an entire division to command.
This gave the Sardinians two opportunities to spoil the Austrian effort. The first would be James who had 1st Command in Palestro sending in the 3rd Zouaves (the blue blank piece) with their furious French attack. The second would be Lewis++ to move the 3rd Command vigorously across the bridge and ensure the Blue team had the numbers to hold and win. Jacks in the north with 2nd Command had to hold the flank on the ridgeline.
How it Played Out

The scenario begins at 0800 in game time, and by 0900 Dr. Truth moves not toward Palestro, but toward the bridge that provided access to the river (1). This is an intelligent play, as before he knows about the Sardinian 3rd Command he will shortly control access to the battlefield from west of the river. Rebelsqurl approaches the ridgeline and discovered enemy (2).
Jacks defends the ridge line (3) while James moves north from Palestro to the ridge (4). This creates a strong defense on the ridge, but leaves a gap at Palestro. So far, no problem as no one is moving into that gap. The 3rd Command remains west of the river (5).

The drama by the bridge intensifies as Lewis++ prepares the Sardinian 3rd Command for a move to the bridge. Lewis++ is waiting for James to conduct an attack to coordinate his move, but dispatches are now cut off by Dr. Truth‘s skirmishers at the bridge. They secure the area, while his main force moves north to attack the ridge (2). James defends, keeping the French Zouaves in reserve. Jacks moves to attack the Austrian flank (3), and Rebelsqurl now has a threat from the north.

In the absence of information Lewis++ orders the attack on the bridge. Dr. Truth has moved extra force to the bridge at the same time, and the defense holds. King Victor Emmanuel is unable to tip the balance. James maintains a defense position on the ridge (2) while Jacks attacks south. Rebelsqurl and other Austrian elements attack north. This pushes the Sardinian line back.

King Victor Emmanuel loses heart as Palestro is held by the enemy and friendly units that have successfully forced the bridge are now exhausted. Enemy units are between the king and his soldiers, and he orders a withdrawal. FML Zobel has stabilized the line and delivers the Austrian cause a much needed morale boost via victory.
Umpire Analysis
I was concerned the simplicity of the situation and proximity of the forces might not be enough for our players, but the nuance of their interlocking decisions yielding an unexpected outcome. The Austrians defeating the Sardinians is not an implausible outcome, so our alternative history holds up.
In the AAR Lewis++ mentioned he could have attacked earlier, and this is true. When Dr. Truth was holding the bridge with only skirmishers at 1000, he could have been in trouble if the Sardinians would have forced the crossing. James yielding Palestro in the move to strengthen his line using the ridge would have been the correct move if the 3rd Command had forced the bridge and threatened that flank. Without aid from that quarter, Palestro became a blocking position that worked for the Austrians.
The game being used is Battle Decisions: Kriegsspiel from Catastrophe Games.
The sparring between the players with the back and forth made for a great scenario. As the umpire I did not know who would prevail until the very end. This is the highest quality outcome.
Mechanically I tried a new technique, using the Discord streaming feature to deliver a visual report with the verbal. I would stream a picture of the map and move an arrow around like I was pointing to a physical map in person. The players did not like it. In a discussion about delivery of the visual portion of the report, they preferred getting a map with numbers on it. Sadly, this is the slowest method of delivery from an umpire perspective. Even more sadly, the way I tried today was very fast, and I maintained 10 minute turns throughout the game.
Going forward we’ll have to compromise and use the third method, which is taking an image of the umpire map and sharing snips of that image in the text channels. This is distant from the in person approach, but it maintains the sanctity of the 10 minute turn and players need more information to keep their forces clear in their heads.
We have to conclude that the way a person tracks their forces is fundamentally different in person than through Discord. The players look at the map and see their pieces, and they move that group of pieces. When you take that image away, players lose track of their own units and the tracking task makes the game less fun. I will continue to use a physical map as I enjoy that when I umpire, and the players will get images.
The commander as non-player characters work. Every player is now maneuvering forces based on a concept given in the briefing, and there are still enough decisions to keep the play interesting, stressful and fun. The historical battles give ample background on the commanders so their decisions can be faithful to the historical context.
For a long period I was disguising the battles as I was concerned players would game the battles based on research. For Palestro, the “reveal” is the position and existence of the French 3rd Zouaves. When we started the game I asked if anyone had read up on the historical battle because they knew which one we were playing, and none of them had! This won’t continue, but the lesson is players are busy and want a unique experience. Showing up fresh to the scenario still delivers.
Great session with experienced players. Very enjoyable. We’ll see you out there.
If you’d like to join one of Kriegsspiels you can pop into this part of our forum for more
and you can also find out about the International Krieggspiel Society here
Thank you for visiting the Regiment of Strategy Gaming and riding with The Armchair Dragoons.
Rather than list a bunch of social media links, the easiest thing to do is to check out our LinkTree, which connects you to all of our various locales around the web.
You can also support The Armchair Dragoons through our Patreon, and find us at a variety of conventions and other events.
Feel free to talk back to us either in our discussion forum, or in the comments below.